I’ve been toying with the idea of setting up a directory server to handle authentication across my entire network. However, setting up a LDAP or Active Directory server comes with it’s own challenges around ensuring availablility, backups, etc. I have a somewhat complex network - three different sites, and multiple off-site users connecting via VPN - and the directory server would need to be available 24x7x365. I don’t really want to deal with the hassle, so I’m testing out a “directory-as-a-service provider” called Jumpcloud.
Jumpcloud is free for up to 10 users, and offers a cloud LDAP service that is completely hands-off. They even have a desktop agent that allows Jumpcloud to manage local user accounts - seamlessly syncing them up to Jumpcloud’s directory.
However, macOS supports LDAP natively, so I was curious if it was possible to skip using Jumpcloud’s agent and configure macOS to authenticate directly to Jumpcloud’s LDAP servers.
This is not a supported configuration, only a proof of concept. Use the Jumpcloud agent in any production environment.
Create your account in Jumpcloud
Sign up for Jumpcloud, and create an account in your Jumpcloud directory. Make sure that under permission settings, Enable as LDAP Bind DN is selected.
Find your Organization ID under the Settings tab, and copy it down for later use.
Configure macOS LDAP settings
Open up System Preferences, and click Users and Groups. Unlock the preferences pane, and then click on Login Options.

Click on the “Join” button next to Network Account Server. Click on the Open Directory Utility button in the bottom left.

In the Directory Utility window, unlock the preferences pane. Select LDAPv3, and then click on the pencil icon in the bottom left.
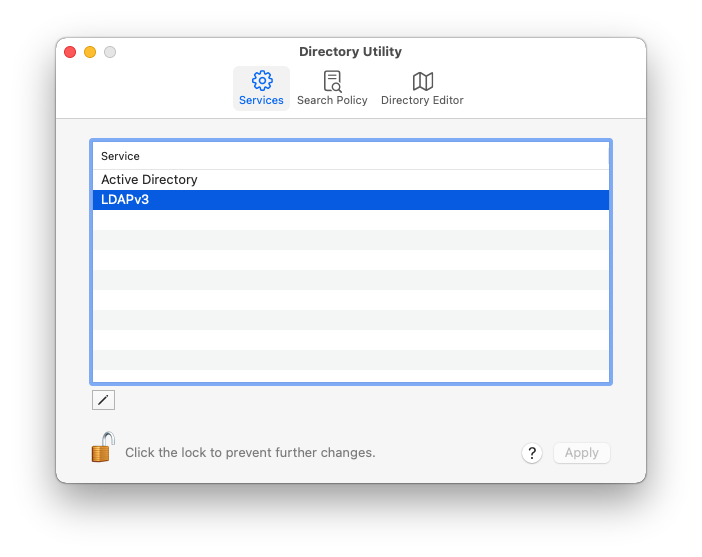
Click on New, and enter ldap.jumpcloud.com for the server name. Check the SSL box, and then click Manual. Click Edit.
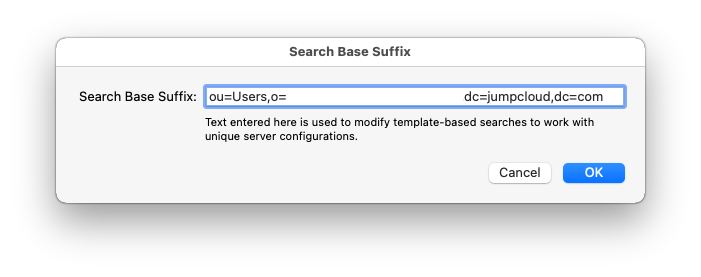
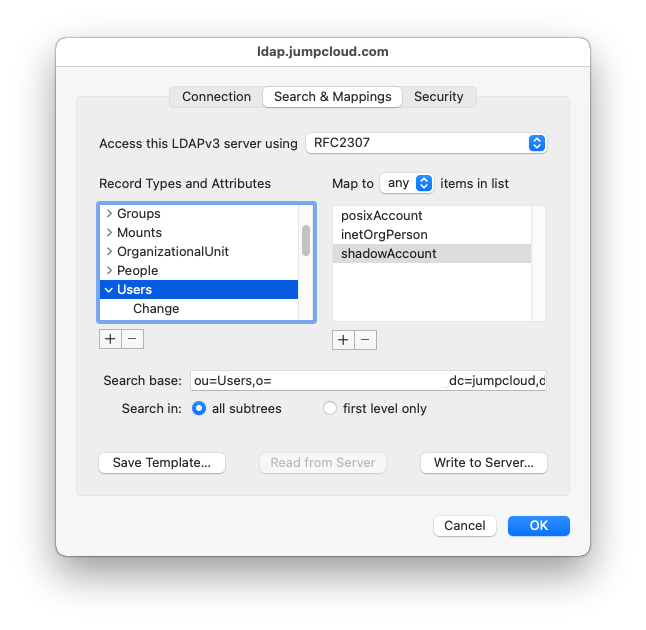
Under the Search & Mappings tab, choose RFC2307 from the dropdown at the top of the window (note that this will change to custom after we make changes). Enter in the following for search base suffix:ou=Users,o=YOUR_ORG_ID,dc=jumpcloud,dc=com
Note: Replace YOUR_ORG_ID with your organization ID, which you can find in the Jumpcloud admin portal.
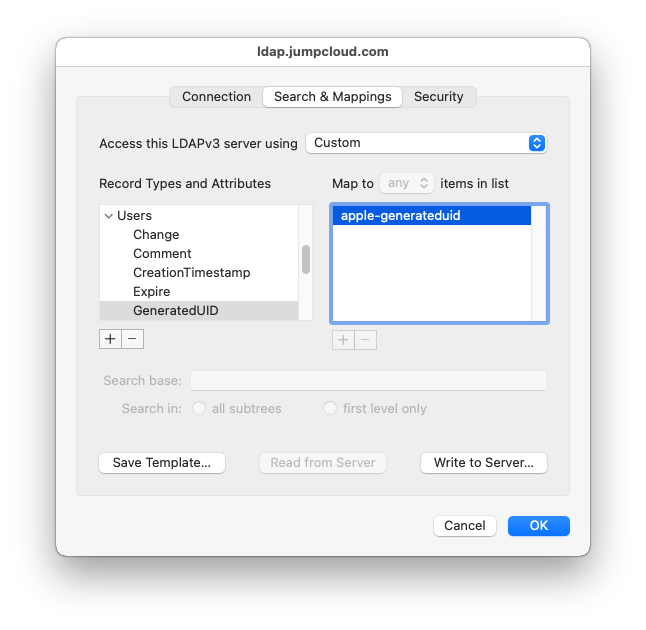
Under Record Types and Attributes, select “Users” and click + button on the left hand side.
Select GeneratedUID and click OK.
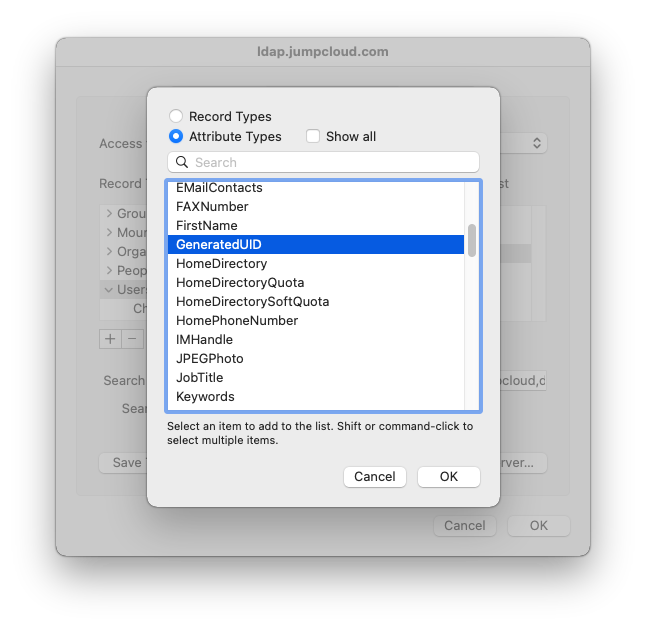
Ensure that GeneratedUID is selected in the left-side list, and then click on the plus icon on the right side. Enter apple-generateduid in the text box, and then press enter.
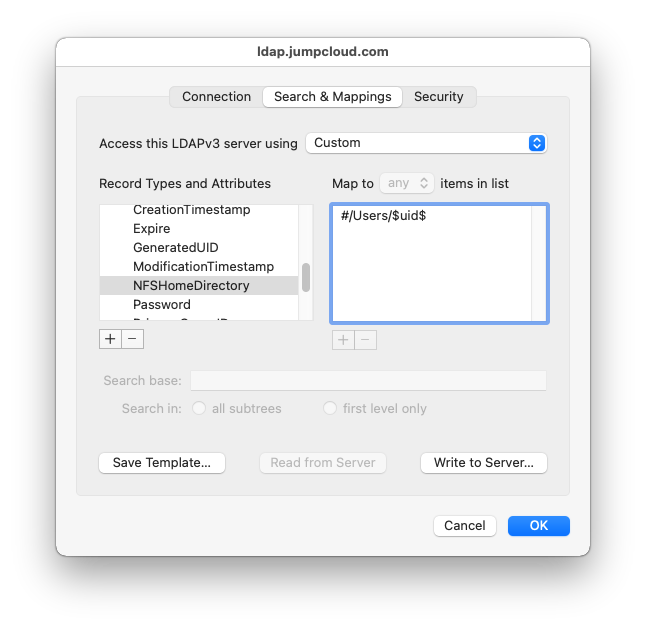
In the list on the left-hand side, select the NFSHomeDirectory attribute. Modify the value for this attribute to #/Users/$uid$
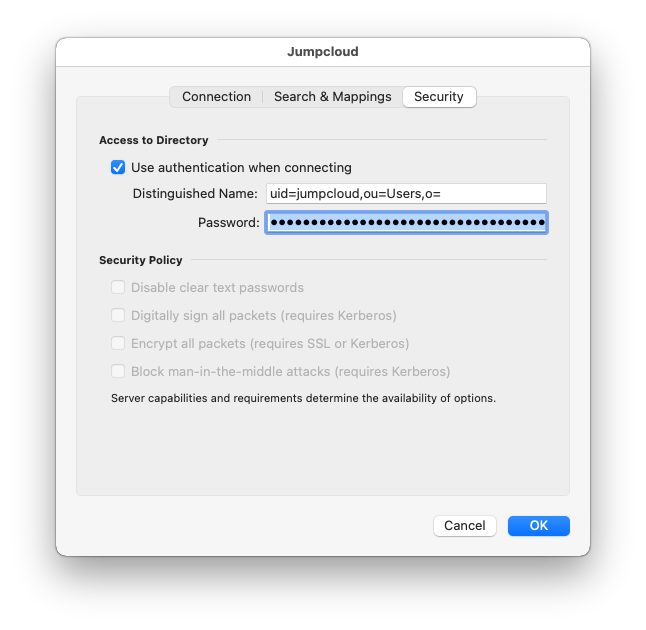
Switch to the Security tab, and check the “Use Authentication When Connecting” box. Under Distinguished Name, enter uid=username,ou=Users,o=YOUR_ORG_ID,dc=jumpcloud,dc=com. Enter the account password, and click OK. Click OK again.
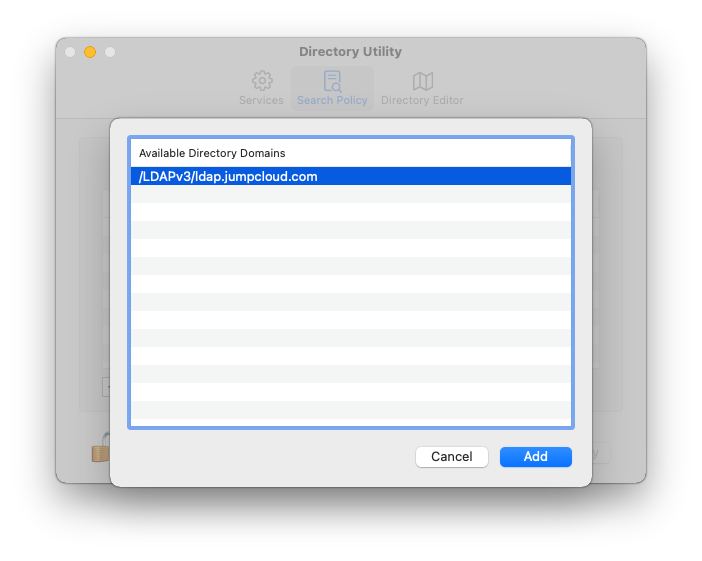
Back in the Directory Utility window, click on Search Policy, and then click the plus icon in the bottom left. Select the Jumpcloud LDAP server, and then click Add. Click Apply, and then authenticate with your local system account to save the settings.
You should now be able to log in using a Jumpcloud LDAP account.
Caveats
-
LDAP accounts are not administrator accounts. You will need to manually grant yourself administrator rights after logging in.
-
If you don’t have a network connection (that can reach Jumpcloud’s LDAP servers), you won’t be able to log in to your Mac. You can manually create a mobile account to allow you to authenticate off network.